Building a Production-Ready IoT Monitoring System with Elixir, AtomVM, and ESP32

I recently dove headfirst into IoT development and built an environment monitoring system from scratch. It’s now collecting real-time data on temperature, humidity, and air quality. Here’s a deep dive into the architecture and lessons learned.
The Challenge
I needed reliable, real-time monitoring without writing C/C++ or using the Arduino IDE. The goal was to leverage the BEAM ecosystem end-to-end: from the microcontroller to the web dashboard.
The Tech Stack
- AtomVM: Running Erlang bytecode directly on ESP32
- Phoenix + LiveView: Real-time web dashboard with auto-updating graphs
- Ash Framework: Auto-generated REST API with models, migrations, and validations
- TimescaleDB: Efficient time-series database for continuous data streams
- Chart.js: Interactive, responsive charts for data visualization
AtomVM: Erlang on a $3 Chip

The first experiment was getting two ESP32 boards to communicate using native Erlang distributed messaging. Seeing $3 chips talk like full-fledged BEAM nodes was a game-changer.
%% Simple ping-pong between two ESP32 nodes
-module(ping).
-export([start/1]).

start(RemoteNode) ->
    Pid = spawn(RemoteNode, pong, start, []),
    Pid ! {ping, self()},
    receive
        pong -> io:format("Received pong!~n")
    after 5000 ->
        io:format("Timeout~n")
    end.
AtomVM supports a subset of OTP, but it’s enough to build real applications. The key limitations to be aware of:
- No hot code reloading (yet)
- Limited memory (~320KB on ESP32)
- Subset of standard library modules
Hardware Setup
Sensors Used
| Sensor | Purpose | Interface | Notes |
|---|---|---|---|
| SHT31 | Temperature & Humidity | I2C | Accurate, recommended |
| MQ-2 | Gas Detection | ADC | Works, but MQ-135 better for air quality |
Pro tip: I initially bought a DHT22, but it doesn’t support I2C—only a proprietary one-wire protocol. The SHT31 is slightly more expensive but much easier to integrate.
Wiring Diagram
ESP32          SHT31
------         -----
3.3V  ───────  VIN
GND   ───────  GND
GPIO21 ──────  SDA
GPIO22 ──────  SCL

ESP32          MQ-2
------         ----
3.3V  ───────  VCC
GND   ───────  GND
GPIO34 ──────  AO (Analog Out)
The ESP32 Firmware
SHT31 Temperature & Humidity Sensor
The SHT31 driver handles I2C communication:
-module(sht31).
-export([start/2, read_temperature_humidity/1]).

-define(SHT31_ADDR, 16#44).
-define(CMD_MEASURE_HIGH, 16#2C06).

start(SDA_Pin, SCL_Pin) ->
    I2C = i2c:open([
        {scl, SCL_Pin},
        {sda, SDA_Pin},
        {clock_speed_hz, 100000},
        {peripheral, "i2c0"}
    ]),
    {ok, I2C}.

read_temperature_humidity(I2C) ->
    CmdMSB = (?CMD_MEASURE_HIGH bsr 8) band 16#FF,
    CmdLSB = ?CMD_MEASURE_HIGH band 16#FF,
    Command = <<CmdMSB, CmdLSB>>,

    ok = i2c:write_bytes(I2C, ?SHT31_ADDR, Command),
    timer:sleep(20),

    {ok, Data} = i2c:read_bytes(I2C, ?SHT31_ADDR, 6),
    <<TempMSB, TempLSB, _TempCRC, HumMSB, HumLSB, _HumCRC>> = Data,

    TempRaw = (TempMSB bsl 8) bor TempLSB,
    HumRaw = (HumMSB bsl 8) bor HumLSB,

    Temperature = -45.0 + (175.0 * TempRaw / 65535.0),
    Humidity = 100.0 * HumRaw / 65535.0,

    {ok, Temperature, Humidity}.
Main Loop: Measure → Send → Sleep
The main node orchestrates everything—WiFi, sensors, and HTTP POSTs:
-module(iot_node).
-export([start/0]).

start() ->
    register(iot_node, self()),

    %% Start buffer manager for offline resilience
    {ok, _BufferPid} = buffer_manager:start_link(),

    %% Initialize RGB LED for status indication
    {ok, _RgbPid} = rgb_led:start_link(RedPin, GreenPin, BluePin),

    %% Connect to WiFi
    case network:wait_for_sta(StaConfig, 30000) of
        {ok, {Address, _, _}} ->
            %% Start Erlang distribution!
            Node = list_to_atom(io_lib:format("atomvm@~p", [Address])),
            net_kernel:start(Node, #{name_domain => longnames}),
            net_kernel:set_cookie(<<"AtomVM">>),

            start_sensor_monitoring();
        Error ->
            Error
    end.

simple_loop(I2C, ADC) ->
    %% 1. Read sensors
    {ok, Temp, Hum} = sht31:read_temperature_humidity(I2C),
    {ok, RawGas, _, _} = mq_sensor:read_value(ADC),

    %% 2. Build JSON:API payload
    Json = io_lib:format(
        "{\"data\":{\"type\":\"sensor_reading\",\"attributes\":{"
        "\"node_name\":\"~s\","
        "\"temperature\":~.2f,"
        "\"humidity\":~.2f,"
        "\"gas_level\":~p}}}",
        [node(), Temp, Hum, RawGas]
    ),

    %% 3. POST to Phoenix backend
    case http_post(ApiUrl, Json) of
        {ok, 201} -> rgb_led:set_color(green);
        {error, _} -> rgb_led:set_color(yellow)
    end,

    %% 4. Sleep and repeat
    timer:sleep(60000),
    simple_loop(I2C, ADC).
Architecture: 3 Independent Processes
For production resilience, the system uses 3 separate processes:
| Process | Interval | Responsibility | Can Block? |
|---|---|---|---|
| Reading Loop | 60s | Read sensors, store in buffer | Never |
| Communication Loop | 10min | POST buffered data to API | Yes (TCP) |
| Main Loop | - | Coordinate state, update LED | Never |
This ensures sensor readings continue even when the server is unreachable. The buffer stores readings offline and syncs them when connectivity returns.
Backend with Ash Framework
Ash Framework saved hours by generating the entire API layer. Here’s the resource definition:
defmodule MyApp.Monitoring.Reading do
  use Ash.Resource,
    data_layer: AshPostgres.DataLayer,
    extensions: [AshJsonApi.Resource]

  postgres do
    table "readings"
    repo MyApp.Repo
  end

  json_api do
    type "reading"
  end

  actions do
    defaults [:read, :create]

    read :recent do
      argument :hours, :integer, default: 24

      filter expr(inserted_at > ago(^arg(:hours), :hour))
      sort inserted_at: :desc
    end
  end

  attributes do
    uuid_primary_key :id

    attribute :temperature, :float, allow_nil?: false
    attribute :humidity, :float, allow_nil?: false
    attribute :gas_level, :integer
    attribute :device_id, :string, allow_nil?: false

    timestamps()
  end
end
That’s it. Ash generates:
-
REST endpoints (
POST /api/readings,GET /api/readings) - Validations
- Query filters
- JSON serialization
Real-Time Dashboard with LiveView
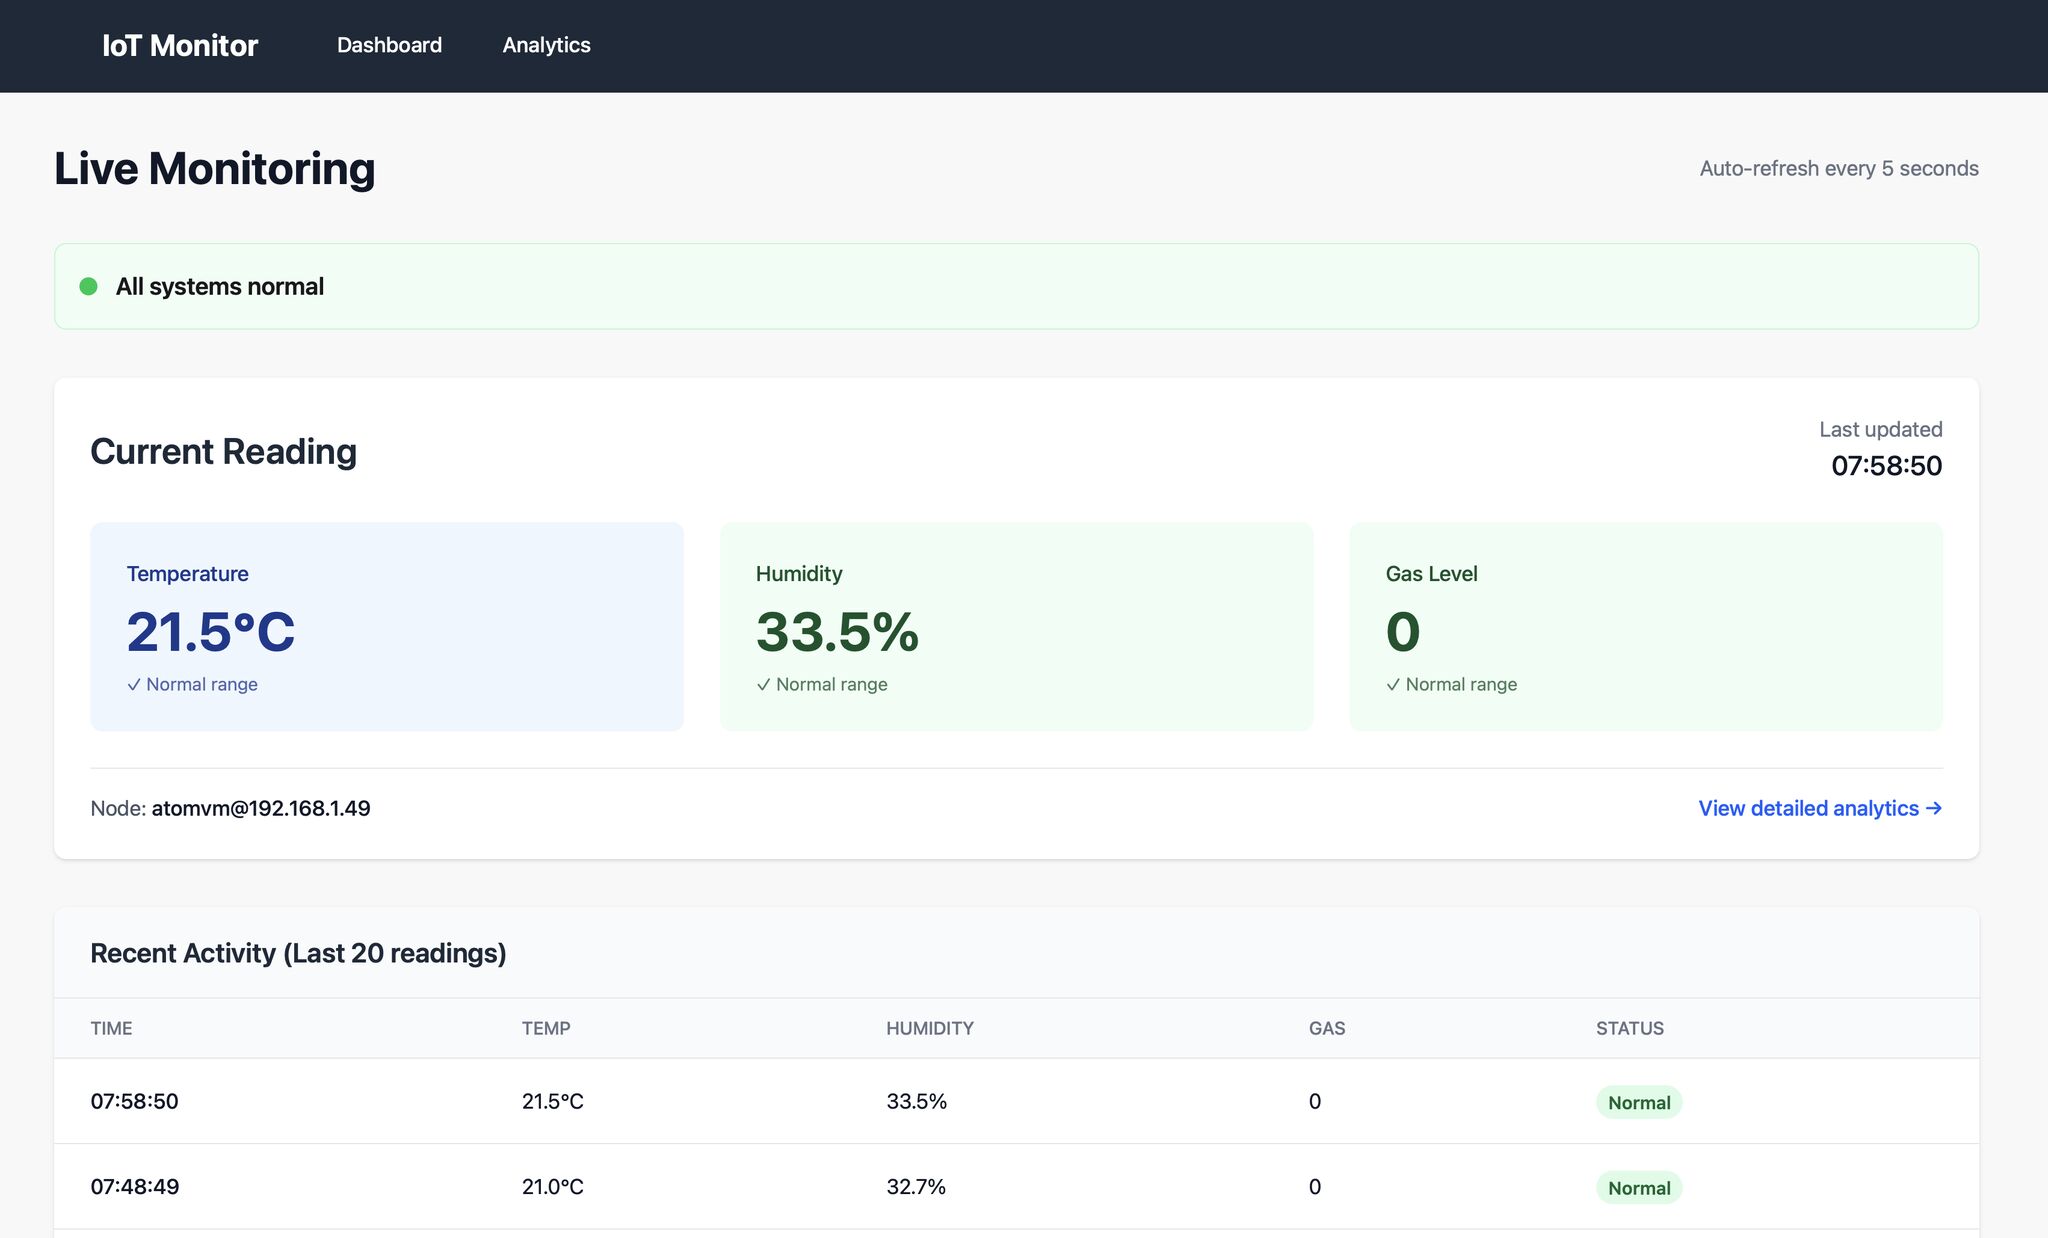
LiveView pushes live updates as data arrives—no JavaScript frameworks needed:
defmodule MyAppWeb.DashboardLive do
  use MyAppWeb, :live_view

  @impl true
  def mount(_params, _session, socket) do
    if connected?(socket) do
      # Subscribe to new readings
      Phoenix.PubSub.subscribe(MyApp.PubSub, "readings:new")
      # Refresh every minute
      :timer.send_interval(60_000, self(), :refresh)
    end

    {:ok, assign_readings(socket)}
  end

  @impl true
  def handle_info(:refresh, socket) do
    {:noreply, assign_readings(socket)}
  end

  @impl true
  def handle_info({:new_reading, reading}, socket) do
    readings = [reading | socket.assigns.readings] |> Enum.take(100)
    {:noreply, assign(socket, readings: readings)}
  end

  defp assign_readings(socket) do
    readings = MyApp.Monitoring.Reading
    |> Ash.Query.for_read(:recent, %{hours: 24})
    |> Ash.read!()

    assign(socket, readings: readings)
  end
end
The template uses Chart.js via a hook:

<div class="grid grid-cols-1 md:grid-cols-2 gap-6">
  <div class="card">
    <h3>Temperature</h3>
    <canvas id="temp-chart" phx-hook="Chart"
            data-readings={Jason.encode!(@readings)}
            data-field="temperature">
    </canvas>
  </div>

  <div class="card">
    <h3>Humidity</h3>
    <canvas id="humidity-chart" phx-hook="Chart"
            data-readings={Jason.encode!(@readings)}
            data-field="humidity">
    </canvas>
  </div>
</div>

<div class="mt-8">
  <h3>Latest Readings</h3>
  <table>
    <thead>
      <tr>
        <th>Time</th>
        <th>Temperature</th>
        <th>Humidity</th>
        <th>Gas Level</th>
      </tr>
    </thead>
    <tbody>
      <%= for reading <- @readings do %>
        <tr>
          <td><%= Calendar.strftime(reading.inserted_at, "%H:%M") %></td>
          <td><%= reading.temperature %>°C</td>
          <td><%= reading.humidity %>%</td>
          <td><%= reading.gas_level %></td>
        </tr>
      <% end %>
    </tbody>
  </table>
</div>
TimescaleDB for Time-Series Data
For efficient time-series queries, I used TimescaleDB (a PostgreSQL extension):
-- Convert readings table to hypertable
SELECT create_hypertable('readings', 'inserted_at');

-- Create continuous aggregate for hourly averages
CREATE MATERIALIZED VIEW readings_hourly
WITH (timescaledb.continuous) AS
SELECT
    device_id,
    time_bucket('1 hour', inserted_at) AS bucket,
    AVG(temperature) AS avg_temp,
    AVG(humidity) AS avg_humidity,
    MAX(gas_level) AS max_gas
FROM readings
GROUP BY device_id, bucket;

-- Query last 7 days efficiently
SELECT * FROM readings_hourly
WHERE bucket > NOW() - INTERVAL '7 days'
ORDER BY bucket DESC;
The Outcome
A robust system that:
- Collects 24/7 sensor data from multiple nodes
- Stores and queries time-series data efficiently
- Delivers real-time dashboards with interactive graphs
- Scales easily to more rooms or sensors
- Runs entirely on functional programming principles
This cut development time by at least 50% compared to traditional stacks, thanks to the BEAM ecosystem’s productivity.
Key Takeaways
-
AtomVM is production-ready: Erlang on microcontrollers boosts embedded productivity without sacrificing performance.
-
Ash Framework is a powerhouse: It streamlined backend development like nothing else. Highly recommended for API-heavy projects.
-
LiveView eliminates frontend complexity: Real-time UIs without maintaining a separate JavaScript codebase.
-
The BEAM unifies everything: From tiny ESP32s to cloud servers, the whole system speaks Elixir/Erlang.
What’s Next
- Expanding with more sensors (CO2, light levels)
- Alert triggers via MQ sensor digital output
- Nerves for more advanced embedded control
- Smart lighting with dimming, color modes, and presence detection
Resources
Have questions about IoT with Elixir? Get in touch — we’d love to help with your next project.